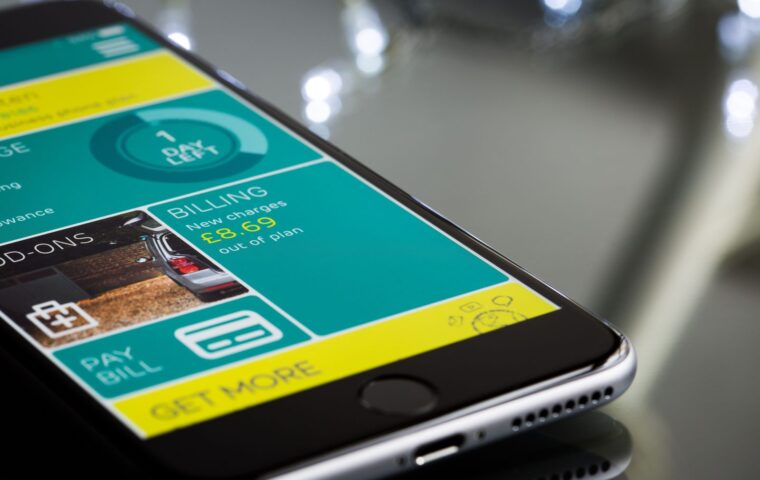
I learned about roaming the expensive way. On my first solo trip abroad, I left data roaming switched on, used my phone like I always did, and came home to a bill nearly three times my usual one. A single afternoon of maps and messages in a cafe had quietly racked up charges I never really agreed to. Nobody warned me. The phone just worked, and didn’t stop until the damage was done.
Here’s the good news I wish someone had handed me back then: getting online abroad without a bill shock is genuinely easy now, and a week of data usually costs less than a couple of coffees. The trick is to decide how you’ll connect before you land, not in an arrival hall on one bar of someone else’s expensive network.
This is the exact routine I run before every trip. Twenty minutes at home, and it spares me that sinking feeling every single time.
Step 1: Find out what roaming actually costs you
Before you buy anything, check what your own carrier charges abroad. Open your carrier’s app or call them and ask two specific questions: what’s the per-day roaming rate at your destination, and is there a daily cap.
Some plans are surprisingly generous and include a region for free. Others charge a flat fee of around $10 to $12 a day, which adds up fast over two weeks. And a few still bill per megabyte — the trap I fell into, where a few map searches cost more than dinner.
If your carrier offers free or cheap roaming at your destination and you’re only going for a weekend, you might not need anything else. The steps below matter most for longer trips, multiple countries, or any pay-per-megabyte plan.
Step 2: Decide between an eSIM and a local SIM
For most travelers, an eSIM is the simplest answer. It’s a digital SIM you install over the internet, usually the night before you fly, with no plastic card and no swapping anything out. You keep your home number on your physical SIM and run data through the eSIM. If your phone is from the last few years, it almost certainly supports this.
A local SIM — the physical kind you buy at a shop in your destination — is often cheapest for a long stay in one country, and usually gives you a local number too. The downside is the faff: finding a shop, sometimes showing your passport, occasionally a clerk setting it up in a language you don’t speak.
My rule of thumb: eSIM for short trips and anything multi-country, local SIM if I’m staying a month somewhere and want the rock-bottom price. The family that crossed Europe almost entirely on points used eSIMs precisely because they were hopping borders every few days, and nobody wanted to queue at five different phone shops.
Step 3: Make sure your phone is carrier-free and eSIM-ready
This is the step people skip, and it’s the one that ruins the plan at the worst moment. A phone tied to your carrier won’t accept a local SIM, and an older handset may not support eSIM at all.
To check the lock status, look in your phone’s settings for a “carrier lock” or “network lock” entry, or ask your carrier directly — they’re required to release a fully paid-off phone in most places. For eSIM support, search your exact model plus “eSIM” and you’ll know in seconds.
Freeing a phone from its carrier can take a day or two to process. Don’t leave it until the airport, because you can’t fix a locked phone from a departure gate. Confirm it early, while you can still call support from home.
Step 4: Buy and install your eSIM before you fly
Pick a reputable eSIM provider — there are several well-known ones that cover most countries — and choose a data plan that matches how you travel. For a week of normal use (maps, messaging, the odd video), something in the 3 to 5 GB range is usually plenty and often costs around $8 to $15.
Install it while you’re still on your home Wi-Fi. The provider sends a QR code; you scan it in your settings, and the eSIM downloads. It sits dormant until you arrive, so there’s no rush and no roaming triggered. I do this the evening before, with a cup of tea, when I’m too excited to sleep anyway.
Don’t activate the data until you land, though — some plans start their clock the moment you switch them on, and you don’t want to burn a day of allowance at home.
Step 5: Switch off roaming on your home SIM
This is the safety net that makes the whole thing foolproof. Go into your settings, find your home SIM, and turn data roaming off for that line specifically. Leave the eSIM as your data source.
Now even if something goes sideways, your home carrier physically can’t run up charges, because it has no permission to use data abroad. Your number still works for the occasional text or call if you need it, but the expensive part is sealed shut.
Watch for automatic app updates, cloud photo backups, and podcast downloads — they can devour your data plan in the background within hours. Turn off auto-updates and set backups to “Wi-Fi only” before you go. This is the difference between 5 GB lasting a week and lasting two days.
Step 6: Land, activate, and test before you leave the airport
When you arrive, switch your eSIM data on, toggle airplane mode off, and give it a minute to find a local network. Then test it properly: load a map, send a message, open a webpage. Do this before you walk out, while there’s free airport Wi-Fi to fall back on.
If it isn’t connecting, manually select a network in your settings or restart the phone. Nine times out of ten that’s all it takes. Once you’ve got a steady signal, you’re done — connected, and not paying a cent in roaming.
That free moment is more useful than it sounds. I use it to pull up directions to my accommodation and screenshot them, so I’m never stranded. It pairs nicely with the kind of free things you can do in expensive cities — when your data’s basically free too, a pricey destination suddenly feels far more affordable.
Step 7: Keep an eye on your usage
Most eSIM apps show your remaining data in real time, so glance at it every couple of days. If you’re running low, topping up is a one-tap job, no shop required.
And lean on Wi-Fi where it’s good — your hotel, a decent cafe — to stretch the plan. I download offline maps and playlists over Wi-Fi at breakfast, then barely touch my data the rest of the day. Treating connectivity as one line in the travel budget is the same mindset behind how one couple funded months of slow travel with cashback and rewards — small, deliberate habits that quietly add up.
Will I lose my normal phone number if I use an eSIM?
No. Your home number stays active on your physical SIM. The eSIM only handles data, so calls and texts to your usual number still reach you — you’re simply choosing the cheaper pipe for the internet.
How much data do I actually need for a week abroad?
For typical use — maps, messaging, browsing, a little video — somewhere around 3 to 5 GB covers a week comfortably if you also use Wi-Fi at your accommodation. Heavy streaming or hotspotting a laptop will burn through it faster, so size up if that’s you.
Is an eSIM safe to buy before I’ve left home?
Yes, and that’s the recommended way. Installing it on your home Wi-Fi doesn’t start using data or trigger roaming. It stays dormant until you switch it on at your destination, so buying early just means one less thing to worry about on arrival.
None of this is technical, and none of it is expensive — it’s mostly about deciding ahead of time instead of letting your phone make the costly choice for you. Spend twenty quiet minutes before your next trip, and you’ll step off the plane connected, calm, and certain that no surprise bill is waiting at home. That peace of mind, honestly, is the best souvenir I bring back.